Sale!


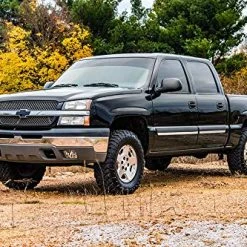


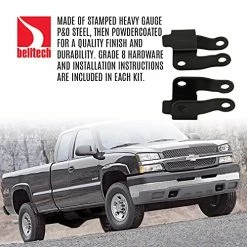
Brand new ???? 1.5-2″ Leveling Lift Kit For 99-06 Chevy/GMC 1500-28330 ????
Original price was: $194.54.$91.00Current price is: $91.00.
- Have the best deals
- Experience Quality, Shop with Us
- Shop with confidence, we guarantee quality.
- Experience the difference quality makes.

- Brand: Rough Country
- Position: Driveline
- Material: Cast Iron
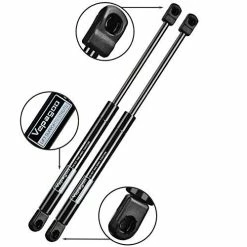
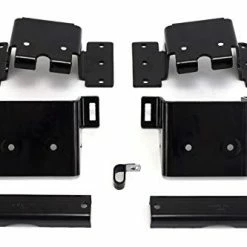
- Cover Included: FRONT: Forged torsion bar adjuster keys REAR: 3″ lift blocks Ubolts Hardware N3 Shocks
- Maximum Lifting Height: 2.5 Inches
- Give your Silverado/Sierra the Perfect Blend of Performance, Protection, and Style from Rough Country.
- Unmatched Ground Clearance | Premium N3 Shock Absorbers the Best in Performance for On and Off-Road Use.
- Durable Forged Torsion Keys | Fabricated Blocks are Stronger and have a Longer Lifespan.
- Easy at Home Bolt-On Installation Supported by RC.
- Backed by Rough Country’s Limited Lifetime Replacement Warranty.
4 reviews for Brand new ???? 1.5-2″ Leveling Lift Kit For 99-06 Chevy/GMC 1500-28330 ????
Add a review
Related products
Sale!
Shocks, Struts & Suspension
Original price was: $19.99.$13.99Current price is: $13.99.
Sale!
Shocks, Struts & Suspension
Original price was: $20.95.$14.67Current price is: $14.67.
Sale!
Shocks, Struts & Suspension
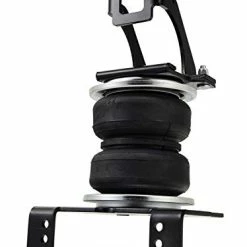
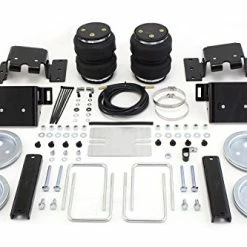
Best Sale ???? Air Lift 57396 LoadLifter 5000 Air Suspension Kit Regular ????
Original price was: $282.00.$81.00Current price is: $81.00.
Sale!
Shocks, Struts & Suspension
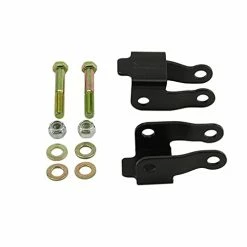
Buy ???? Elltech 6654 Shock Extension Kit Fits 99-06 Silverado Sierra 1500 All Cabs ❤️
Original price was: $51.03.$35.72Current price is: $35.72.
Sale!
Shocks, Struts & Suspension
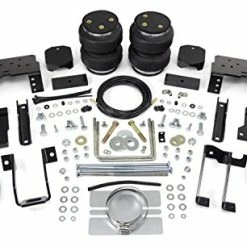
Best Sale ✨ Air Lift 57338 LoadLifter 5000 Air Suspension Kit Regular ????
Original price was: $237.00.$86.00Current price is: $86.00.
Sale!
Shocks, Struts & Suspension
Original price was: $18.78.$13.15Current price is: $13.15.
Sale!
Shocks, Struts & Suspension
Original price was: $20.49.$14.34Current price is: $14.34.
Sale!
Shocks, Struts & Suspension
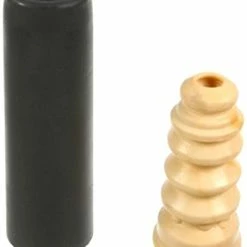
Hot Sale ???? Energy Suspension 9.8107G 5/8″ Hourglass Shock Eye Bushing ????
Original price was: $5.29.$3.70Current price is: $3.70.
SoTexSmoker –
I wanted some lift to accomplish two things: 1) Make my 4×4 actually look like one (come on GM…Z71’s used to be high enough as a stock pickup) and 2) keep my 285/75/16’s (33’s) from rubbing (this kit accomplished a third thing by including shocks which replaced 12 year old originals). So I got the shocks replaced as a bonus…..sweet.Now let me clarify a few things. 1) You don’t need a “Torsion bar removal tool”, but I could see how it would be safer. I ordered it, but returned it to Amazon after reading the directions included in the kit (tools needed section recommended a Ball Joint Remover like OTC 7249 which Autozone lets you rent for a $100 deposit and you get it back when tool is returned).I used the Ball Joint remover, but it wanted to slip out under the pressure so I improvised….. The cross member holding the Torsion Keys has a hole on top of it conveniently at the exact place you set the Ball Joint Remover. I simply put a stubby screwdriver inside the hole of the BJR and the stubby shaft went into that hole on the cross member (this locked the top of the BJR in place keeping it from slipping). The rest was a piece of cake. Simply crank up the key to remove the bolt / nut block / key and reinstall new key. Then reverse it to install new keys. Simple.2) Tools needed section states you need an 18 mm socket (torsion key adjuster bolt), 21 mm socket (shocks / U bolts) which was true. What’s not mentioned is the 22 mm socket for the new U bolt nuts.3) The new blocks have a nipple that must line up with the hole on the axle bracket (also the new blocks are tapered so that the front of vehicle side is shorter than the rear side). 3a) Instructions call for removal of wheels, shocks, etc. SAVE TIME AND DO THIS ON REAR…. ** While on a level surface, craw under the bed and remove one side of the U-bolts and shock. Get a jack and place it directly under the leaf spring. Lift the leaf spring until the gap is big enough to slide the block in. Lower the leaf spring and attach the new U-bolts and tighten. Repeat on other side. Seriously, it takes about 15-20 minutes using an impact wrench.4) As far as the ride……well, I can’t tell much difference other than it feels more like it has better shocks to stiffen it up. I don’t think it’s rough by any means. Just stiffer. Is that shock or is that a rougher ride? I don’t know, but I’ll take it.5) This kit does not include shock boots…FYI.Hey I hope this helps you guys “pull the trigger” on this kit. I am really satisfied with the new look of my old pickup. I wish I would’ve done it sooner. It’s a daily driver / family truck so don’t expect this lift to satisfy your “Monster” truck aspirations. Time will tell if the new CV angles will be an issue, but Parts Geek . com has em for $54 so I’m not too concerned.Enjoy your new stance…
Jay –
As far as the kit goes, worth every penny. Just make sure you buy the shock covers seperate because they don’t include. Still a great value for the money.. I don’t work on vehicles but I knew I could install it after reading instructions and watching a few videos. Took me and a buddy like 8 hours but we also made multiple trips to the auto and hardwares stores to get deep sockets, wrenches, impact, etc. Just buy it all first. I need 2 jack stands, 2 bottle Jack’s, an impact, socket set, deep sockets 21, 22, 15 and 18 I believe as well as the same size wrenches, a 3 foot cheater bar (just trust me) some anti size lubricant, some wd40 or something similar… do your research and save a headache because I did not haha. But it turned out sick, put new 33″ bfg ko2 tires on it afterwards and we are rollin
casual buyer –
Overall, the install was fairly easy (working on a garage floor) the toughest part was the keys and torsion bars, the keys were rusted to the torsion bars in addition to the bars were twisted in the lower control arm. There are some great help videos on getting through this, you have to get A-arm loose first then focus on the keys, once I was able to get the torsion bar loose( yes I had the tool to release the keys), I had to drill and break the keys to get them to release from the torsion bar, make sure you use Anti seize on everything just in case you have to take it apart again. I have adjusted the ride height a couple times since the install as everything is finally settling in at 500 miles. make sure you check your tie rods and ball joints, mine showed a bit of wear at 90k miles so I did everything all at one time. the finished ride is firm but not terrible, I can go down the highway and not get the hay wagon feel I was afraid of. If I had another truck like this, I wouldn’t think twice about using this kit again.
Andrew L. Yarnell –
I did a ton of research on level kits and this one consistently came in on top for value, ease of install, and performance. I agree, the install was very easy with the right tools. I love the look of my 1999 Silverado now,it’s not Grandpa’s truck anymore. I put 285/70r17 BJG’s on and it works great. Only rubbing on the driver side inner plastic liner on full lock left turns.